My HDD Died - Migrating and Restoring Immich Backup
A couple of days after migrating Immich uploads to Unraid, my Immich server died. It was unable to boot due to corrupted data on the hard drive. I tried various ways to recover it but spent way too much time on it and decided that the laptop it was running on would be laid to rest—its time had come.
Luckily for me, I didn’t lose any data. All the photos were uploaded to Unraid, and Immich had a daily PostgreSQL backup. I didn’t have to restore Immich, but I figured it would be a valuable learning experience should it happen in the future and for anyone in the same situation. If you’re just setting up Immich with a similar setup, this guide is for you too.
Setup
Not too different from before. Previously, I mounted the share directly on the Debian server on my laptop and set the Immich upload path to the mount. This time, because of how I had to mount the share on the LXC, it posed some permission challenges.
Steps
1. Create and Configure NFS Share
On Unraid, create a share and set the NFS share rule. Note that the address is the address of your Proxmox node, not the LXC.
192.168.50.123(rw,sync,no_subtree_check,no_root_squash)On the Unraid server, change ownership and group of the files and directories on the share:
chown -R 100000:100000 /mnt/user/immich
chmod -R 775 /mnt/user/immich
2. Create a Docker LXC
I’m using Docker as I want to install Immich using their recommended Docker Compose method. I’m also using an LXC instead of a VM as it is lighter. Follow the script here. I’m also using an unprivileged container and installed the Portainer agent.
3. Mount the Share on the PVE Node
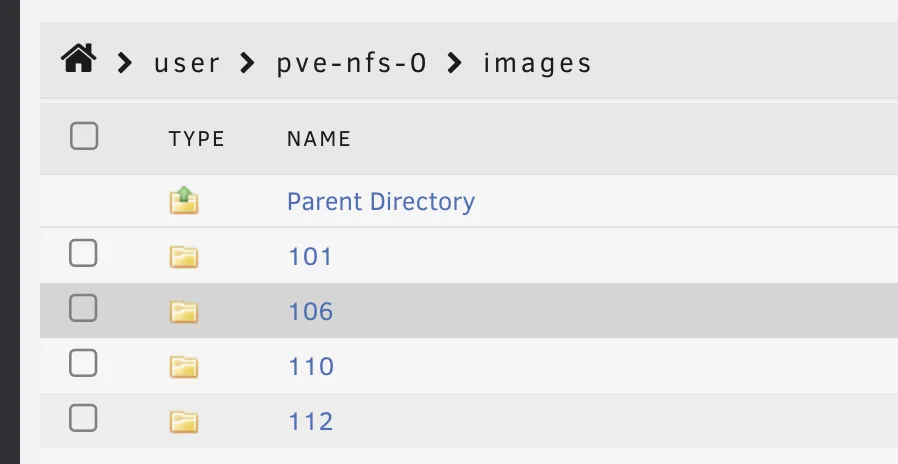
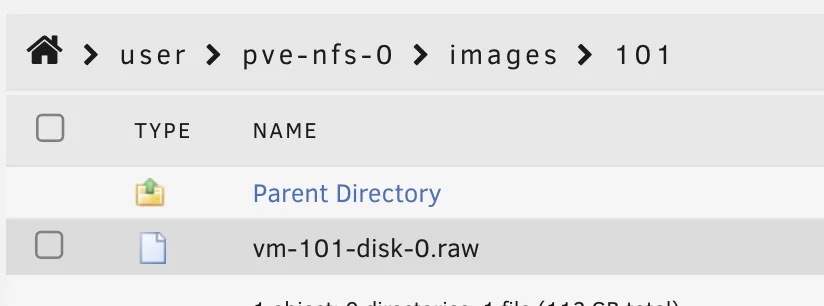
In my previous post, I mounted a volume using the GUI. Doing this, we can’t really see the photos on Unraid—unless that’s what you want. With this method, only a single image file appears on Unraid.
Instead, we want to mount it manually:
Open fstab:
nano /etc/fstabAdd the following:
192.168.50.223:/path/to/unraid/share/ /mnt/unraid/immich nfs defaults 0 0Note: 192.168.50.223 is the IP of my Unraid server.
Reload and mount the shares on the Proxmox node:
systemctl daemon-reload
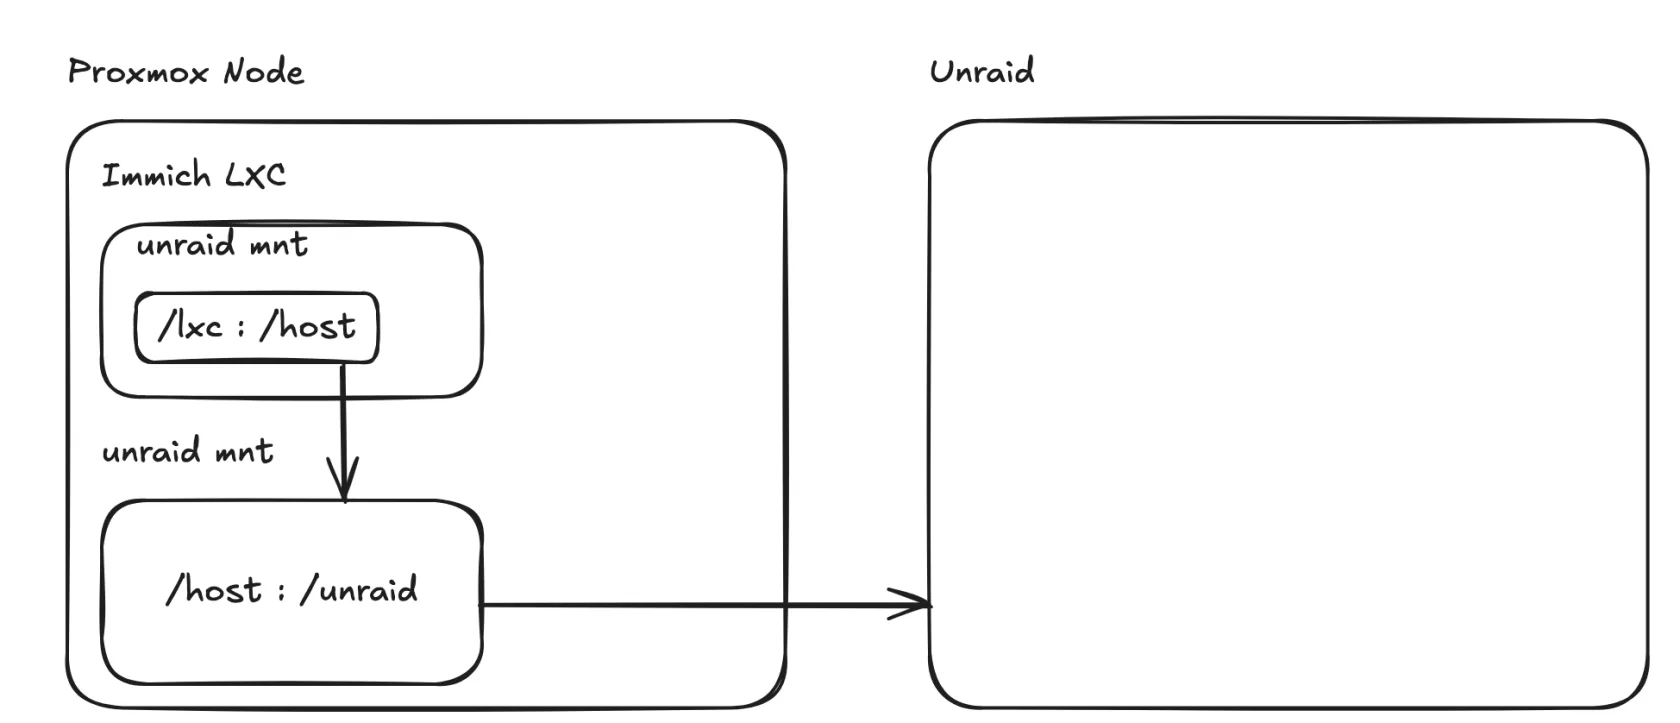
mount -a4. Configure LXC Mounting Point
In your node shell, modify the LXC config file:
nano /etc/pve/lxc/[your-container-id].confAdd the following config to configure the mount point:
mp0: /mnt/unraid/immich/,mp=/mnt/unraid/immich- The first path
/mnt/unraid/immich/is the path on the Proxmox host. - The second path after
mp=(/mnt/unraid/immich) is where it will appear inside the LXC container.
Add the following config to configure the idmap:
lxc.idmap: u 0 100000 65536
lxc.idmap: g 0 100000 65536
Restart your container:
pct stop [container id]
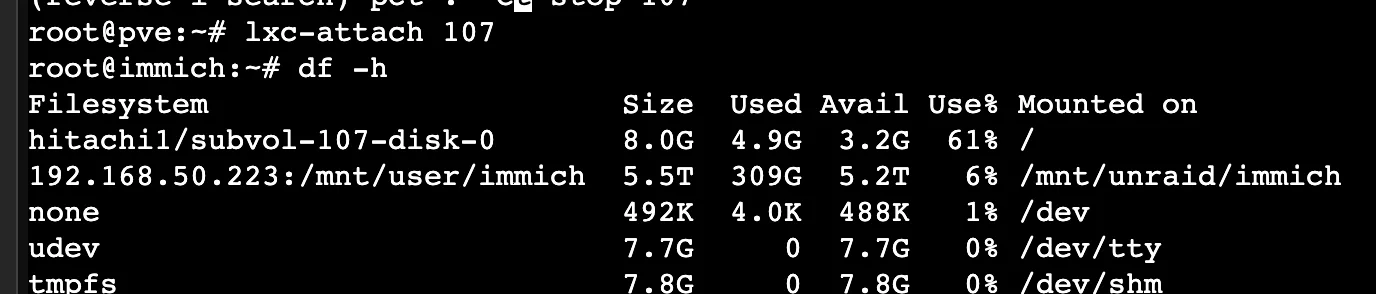
pct start [container id]Run
pct listto see all your containers and their IDs.
If you open the container shell and run df -h, you should see the new volume:
5. Set the Share Directory Permissions
Open the console on Unraid:
chown -R 100000:100000 /path/to/share
chmod -R 775 /mnt/user/immich
exportfs -raTLDR: We have to set the root user UID in the unprivileged container to match the NFS share in Unraid.
6. Verify Read/Write Access
Open your LXC, navigate to the mount point, and try modifying files in the folder. You should be able to rename the .immich file or its contents from the LXC and create a new file in the mounted location.
7. Install Immich via Docker
For both restoring and first-time installation, configure the .env environment variables. Set the upload location to the LXC mount point (/mnt/unraid/immich).
7a. Restoring Immich Backup
Follow steps 1 and 2 of the setup guide here. Then go to step 8.
7b. First-time Install
Follow the steps to install Immich. Ensure the upload path is set correctly as described in step 4. Try uploading a photo—if successful, images should appear in the Unraid share.
8. Restoring Backup and Data
Follow the backup and restore steps carefully. If the server has already started, shut it down and delete the PostgreSQL data directory in the LXC. Make sure you select the correct backup file.
Example restore command:
gunzip < "/mnt/unraid/immich/backups/immich-db-backup-1738548000008.sql.gz" \
| sed "s/SELECT pg_catalog.set_config('search_path', '', false);/SELECT pg_catalog.set_config('search_path', 'public, pg_catalog', true);/g" \
| docker exec -i immich_postgres psql --dbname=postgres --username=postgres
Finally, start the entire stack:
docker compose up -d9. Verify Successful Restoration
If successful, visit the Immich login page. You should be prompted to log in instead of creating an admin account, and all previously uploaded photos should be visible.